Tuesday 30 May 2017

In Summary...Carpe Diem Recipe planning with Kylie

Hi friends!

Kylie with you all again today for my final wrap up of my recipe planning.
I hope you have enjoyed the last month or so, and it has inspired you to give a recipe planner a try.Really I have only just scratched the surface in how you can set up one of these babies.Let's take a look at some of my fave pics from the month!


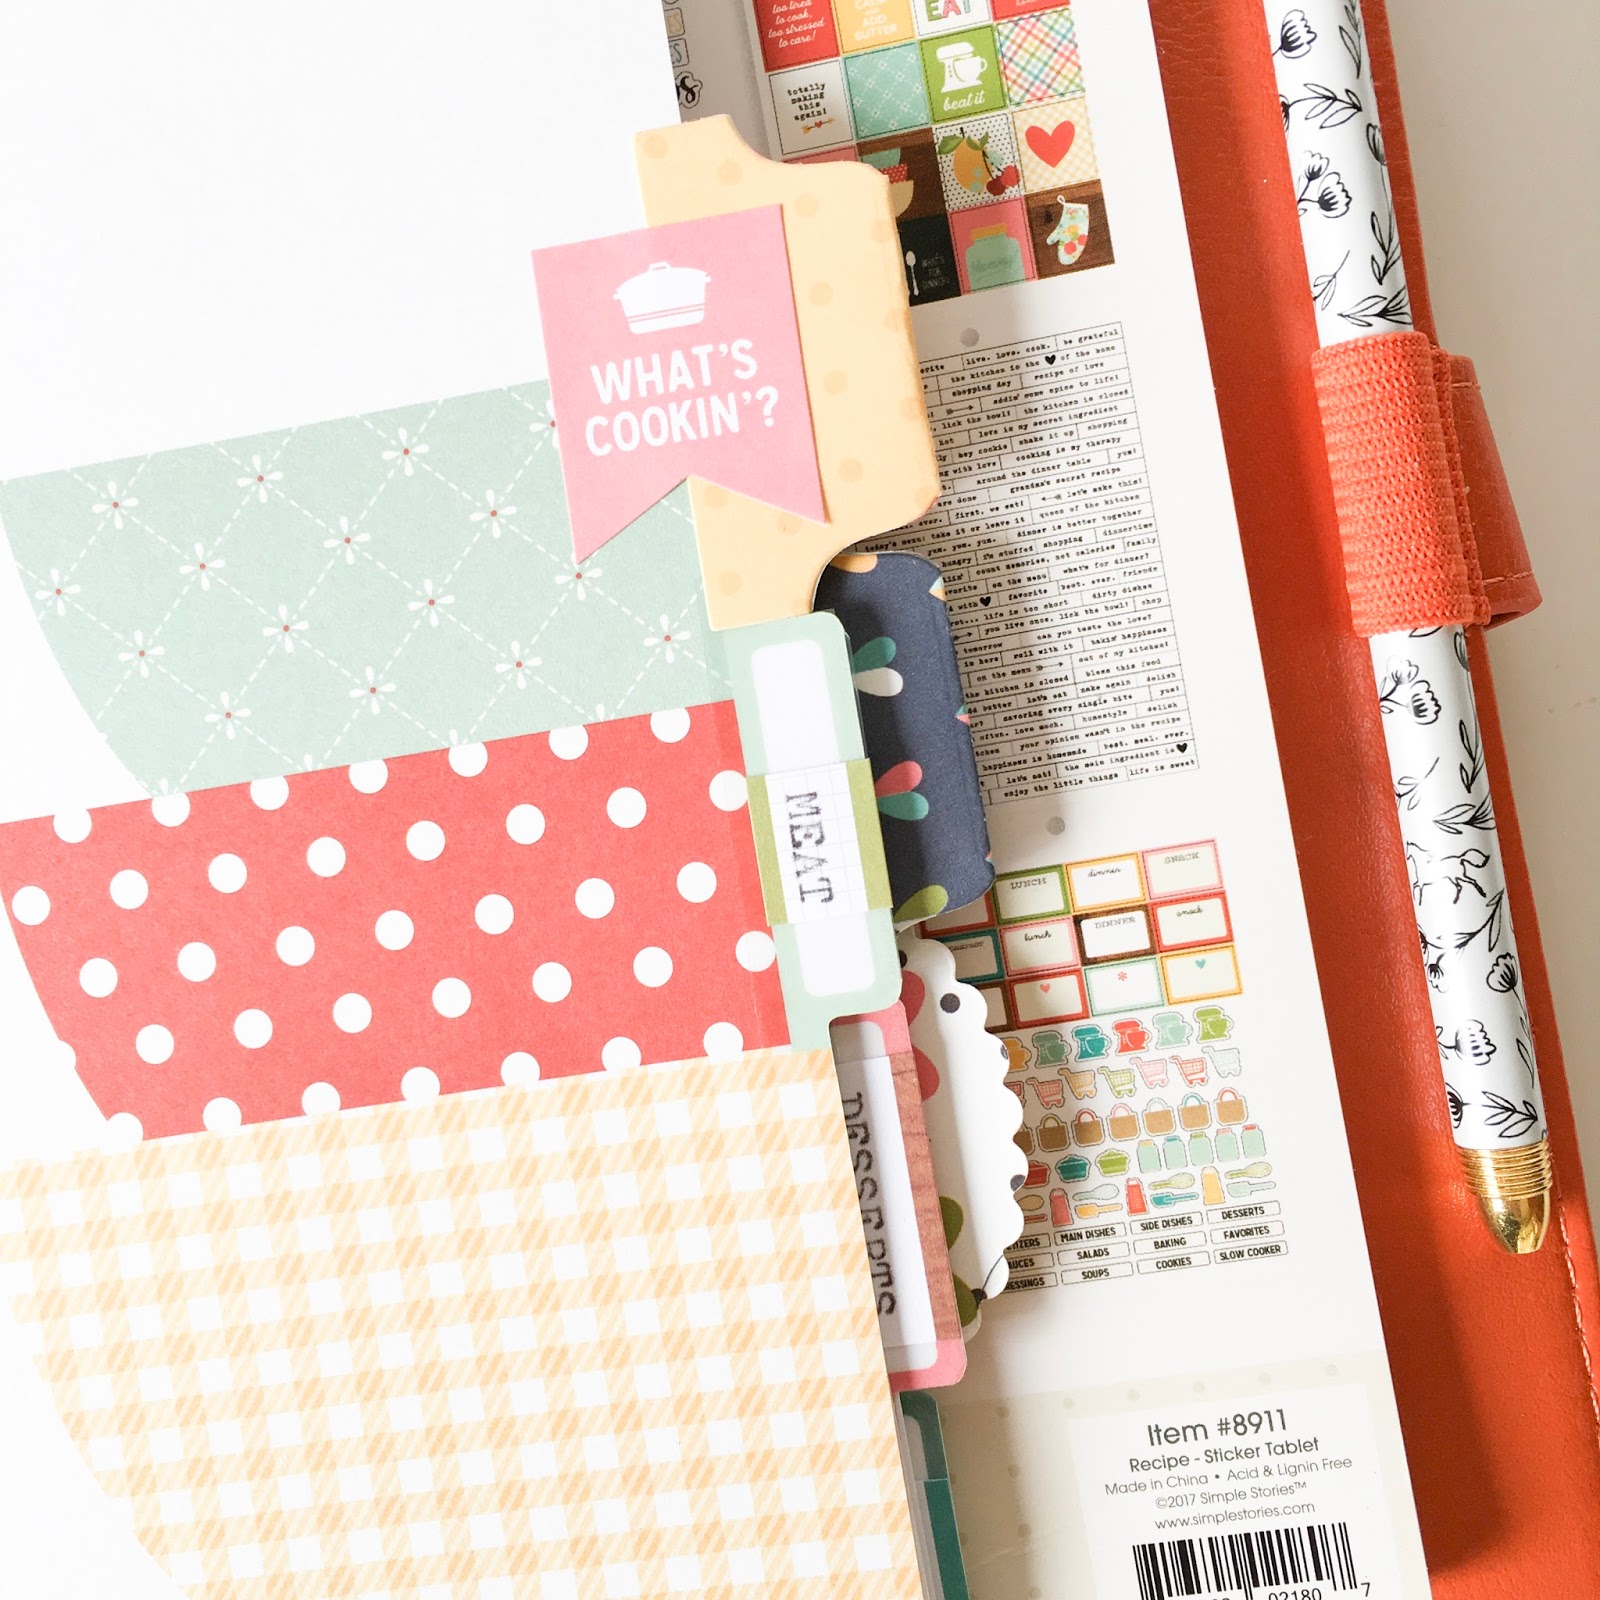
Everyone has their own unique style when it comes to planning.For me I love to jam pack those pockets full with eye catching elements.When you first open my planner I think it gives a sense of fun, and yet it is a really practical tool.


I adored these free printables! (See my previous posts for the link!)


I loved these dividers too.Simple Stories always have the most adorable graphics!


I hope you will try my little tip using the stickers for your own planning.It really gives a fun effect.


It might be just me but I don't ever think you can over embellish a dashboard!


I received so much positive feedback after sharing my meal planning pages. I'm so glad they inspired you all.You will be happy to know I am still on track for my meal planning....However my exercising hasn't been going too well.......Oops!


I'm still typing out all my recipes to add but I can tell you how much better I feel having them all neat and in the one place now.When it's time to cook you can easily remove the page you need.


Thanks for following along these pasts few weeks.I can't wait to share with you all what I have in store for June.
Can you believe we are already half way through the year???

Until next time,


Thursday 25 May 2017

Be Beautiful Art Journal Page by Farrel Tailor

Hello Sassy lovelies!!! 

I'm back with another mixed media tutorial for you all today. Last week I featured the amazing Dina Wakley Scribble Sticks and I thought I would do another art journal page using them again but in a different way. I also wanted to show you how to use the incredible Prima Watercolor Resist Pen. 

So let me give you a quick run down of how I created this page and at the end of the post there is a process video if you wanted to see me in action.


So I started by drawing my tulips with a pencil and once I was happy, I then went over it using the Prima Watercolor Resist Pen. This pen is amazing!!!! You have to wait for the liquid to dry and for the best results leave it over night. But I am an impatient scrapper so I used my heat gun and then let sit for about 15 min before I moved on to colouring the flowers. 


So how the Watercolor Resist Pen works is once it's dry, it acts as a seal so you can use this with your watercolour paints or pencils or crayons....anything really.

 So the next thing I did once my resist pen was dry was to use the Dina Wakley Scribble Sticks to colour in my tulips. The colours I used were - Magenta, Lemon, Lime, Sky, Night, Tangerine and Blackberry. I used my water pen to take the pigment from the stick and used them as a watercolour medium.


Next I used the Distress Oxides for my background. I started by blending Broken China and Faded Jeans with a blending tool and then sprayed with water. But I found using my water pen was much easier and I was able to get into the small spaces as seen here with Cracked Pistachio


Once that was all dried, I then had the pleasure in removing the harden liquid from the Watercolor Resist Pen...and all you have to do is use your fingers and rub it off.


I then used Heidi Swapp Magnolia Jane Clear Stamp set Special Words and Icons with Versafine Black Onyx. And to finish it off I used my black and white Uni Posca Pens for highlighting.


Here is the process video


Thanks for dropping by and hopefully I have inspired you to be creative 
Farrel xx


Photobucket

Tuesday 23 May 2017

Carpe Diem Recipe Planning - Part 4 with Kylie

Hi friends! I hope your week has been lovely.
Kylie back with part 4 of Recipe Planning. Week 4!! Hasn't the time flown?? I have been super busy in my recipe planner this week, adding in all my fave recipes. I thought long and hard about how I was going to label each divider, and decided on 
Chicken
Meat
Dessert
& Baking.
I really wanted to keep it easy.But you can customise your own to suit yourself!


Using my trusty typewriter I added to each label from a tab sticker in the sticker book and onto each divider.


Because the tabs on the dividers don't stick out a whole lot, I punched some extra tabs that were larger, and adhered above them.I liked this effect but you may be happy with just the tabs on the dividers themselves.


I totally love these recipe sheets! As you can see, again I have used my typewriter to write up my recipes. My handwriting isn't the neatest, (yeah um like eww!) 


I added a small pic for fun as well.


The side tab of the recipe sheets is really handy also for adding in smaller details of your dish.


You can mark in its difficulty and give it up to a 5 heart rating! It's also handy to add in any tips.


I've been super happy with how this is all coming together! Those decorative stickers are the best!


I hope you have enjoy my post today.
Until next week,
Kylie xoxo


Monday 22 May 2017

Agnus | Pocket Page Insert with Elle's Studio Live Laugh Love collection

Hi again :) I loved using the Elle's Studio 'Live Laugh Love' collection to document our March memories and because I still had heaps of great pieces left over I decided to using this collection to create an insert to record our little puppy's first day at the park.  


I cut a 12x12" A design page protector in half vertically to create a simple 6x12" insert and like the way it works between my previous pages


Besides adding photos, I pretty much let the products do all the work for my insert and the hardest part was deciding which patterns to use.


After creating lots of backgrounds and cards for my earlier pages, I was left with quite a few 2x4" strips from the 6x6" paper pad which I paired up to create some two toned cards as backgrounds for my horizontal photos.


I used the white alpha stickers and enamel dots to create a simple filler card, and loved the way it pops against the coloured background. I also added a hand stitched border to define a couple of the smaller photos on the page.  


Going with printed journal strips over the cut-out and die-cut pieces to record the details of the day and finishing things off with some of the awesome puffy stickers..


I mirrored the majority of the photo placement on the reverse side of the insert.  


This side also shows how I used the stitched border to secure a tab to my insert. To achieve this I simple stuck two patterned paper strips to the outer edges of both photos before adding the stitched border to each pic. Once stitched, I adhered both photos and paper strips together and cut out a v shaped notch from the edge. I cut a small slit on the front side of the page protector to allow the photos and tabs to slip inside the pocket. 


Once again allowing the products to do the work... I finished things off with more fun patterns, some puffy stickers and a cute wood veneer piece. 


Products from the Sassy Store...
Elle's Studio Live Laugh Love 6x6 Paper Pad
Elle's Studio Live Laugh Love Puffy Stickers 
Elle's Studio Live Laugh Love Bits & Pieces
Elle's Studio Live Laugh Love Cutouts
Elle's Studio Live Laugh Love Wood Veneer
Elle's Studio Live Laugh Love Lil Snippets Word Labels
Elle's Studio Live Laugh Love Woodgrain Paper 12x12
Elle's Studio White Alpha & Number Stickers
Heidi Swapp Memory Planner Date Stamp
Simple Stories Domestic Bliss Enamel Dots


Thanks for stopping by xx
Photobucket
09 10